
Here’s how to make your very own guitar shaped box!
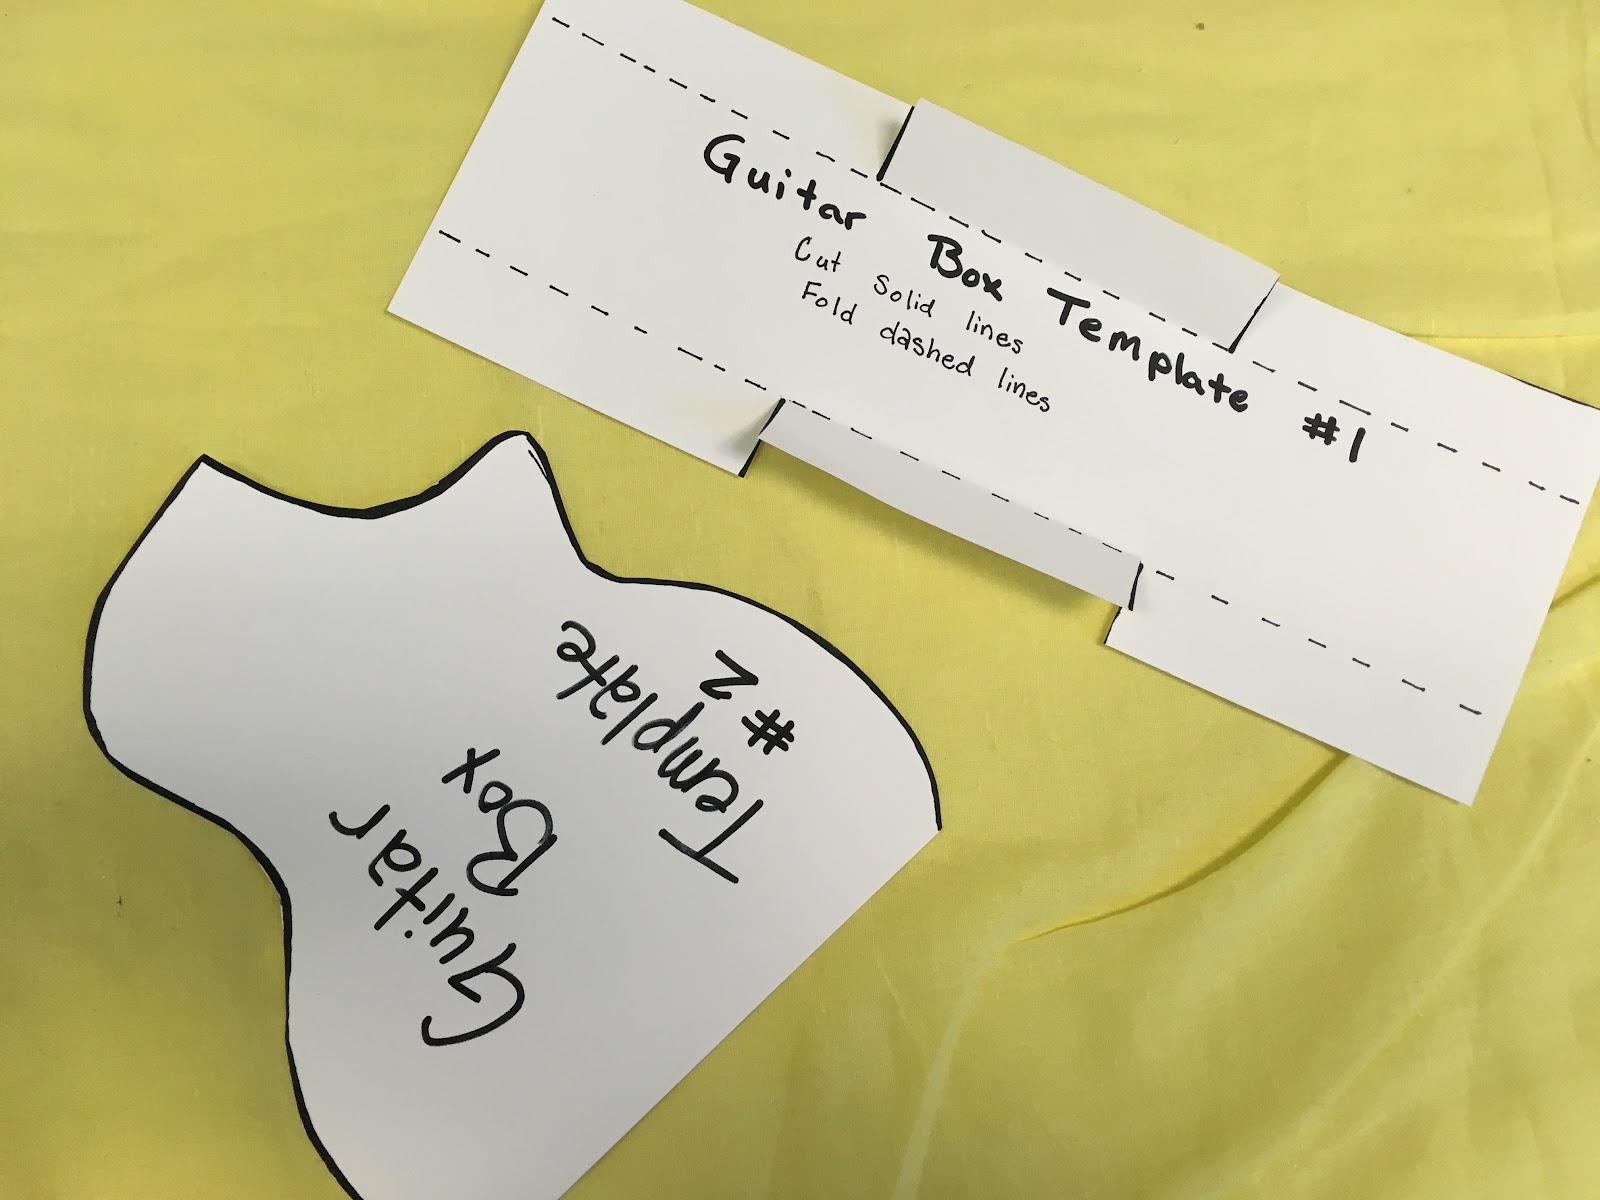
The first step is to print these Guitar Box Templates on Cardstock. Cut them out so you’re ready to
go! On the first template, be sure to only cut the solid lines, not the dashed ones.

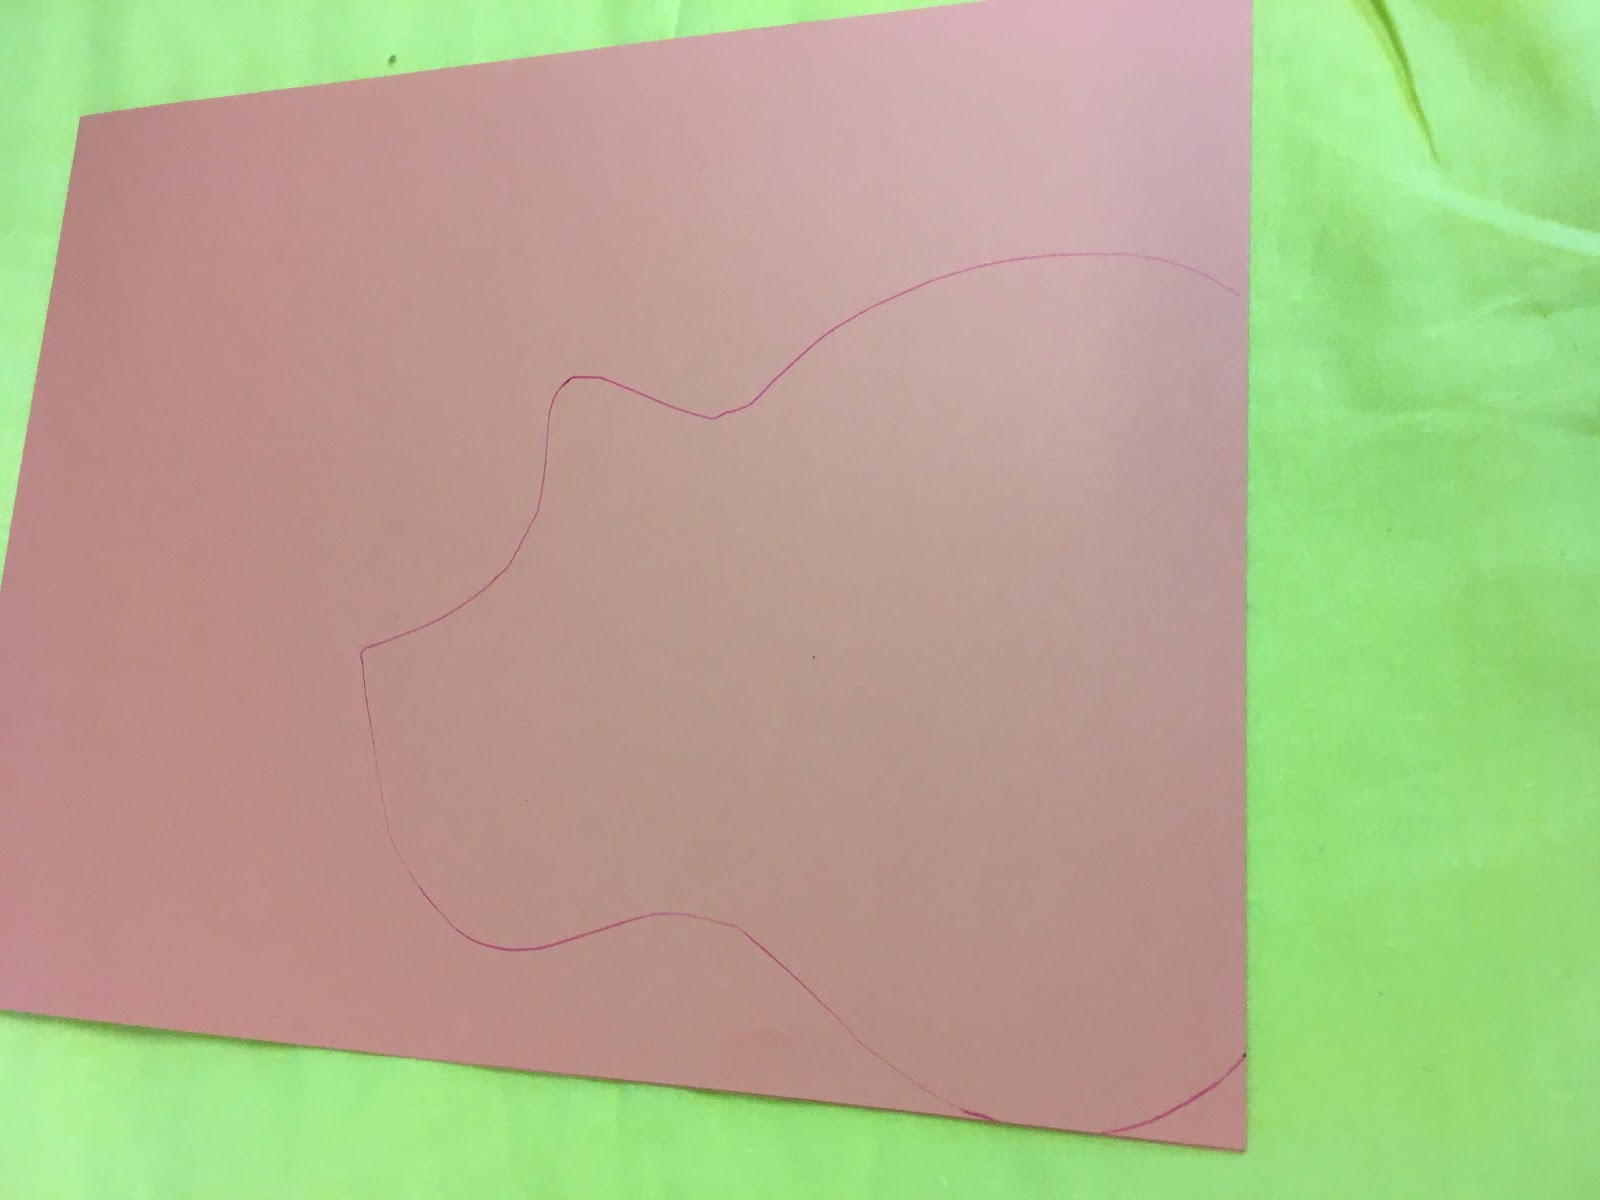

Next, trace both of these templates on your preferred color of cardstock. You will need one copy of
template 1 and two copies of template 2 (see what I did there?). It is easier to trace template 1 if you
fold the sides in to trace the vertical lines.
Both shapes can be traced in from the edge of your cardstock, as they have flat edges.
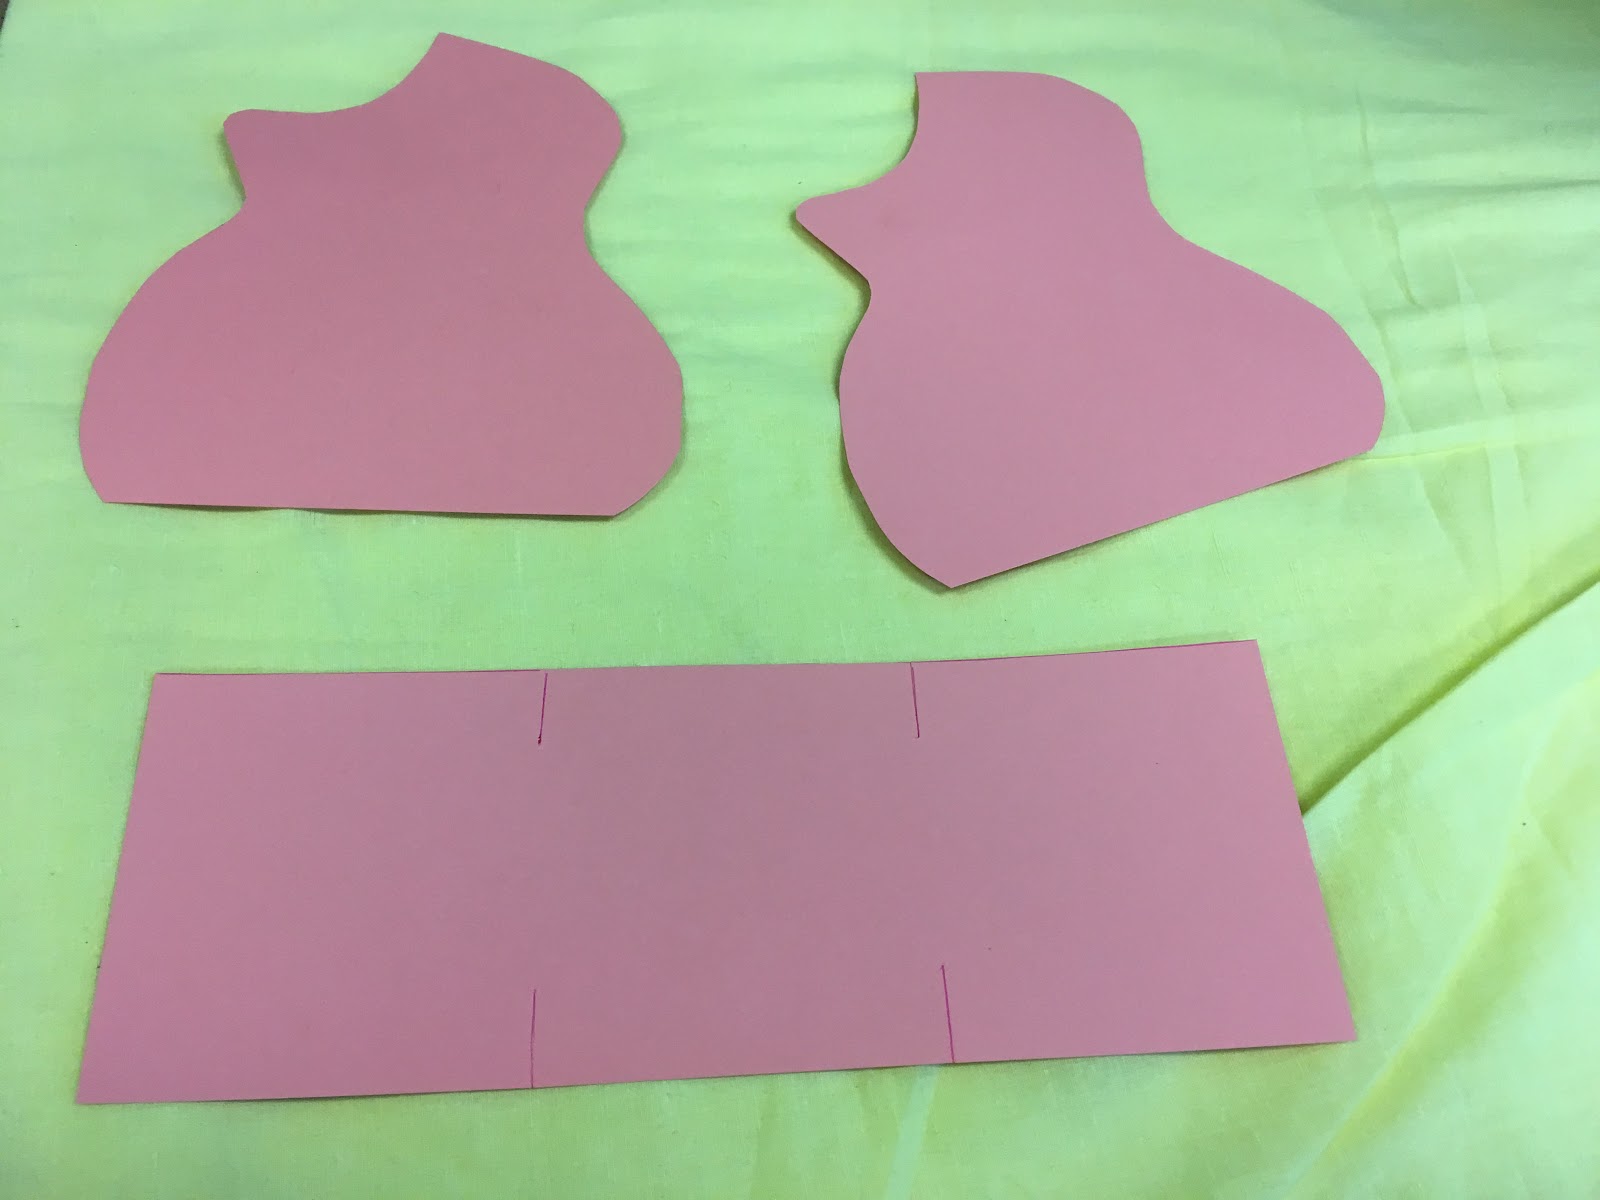
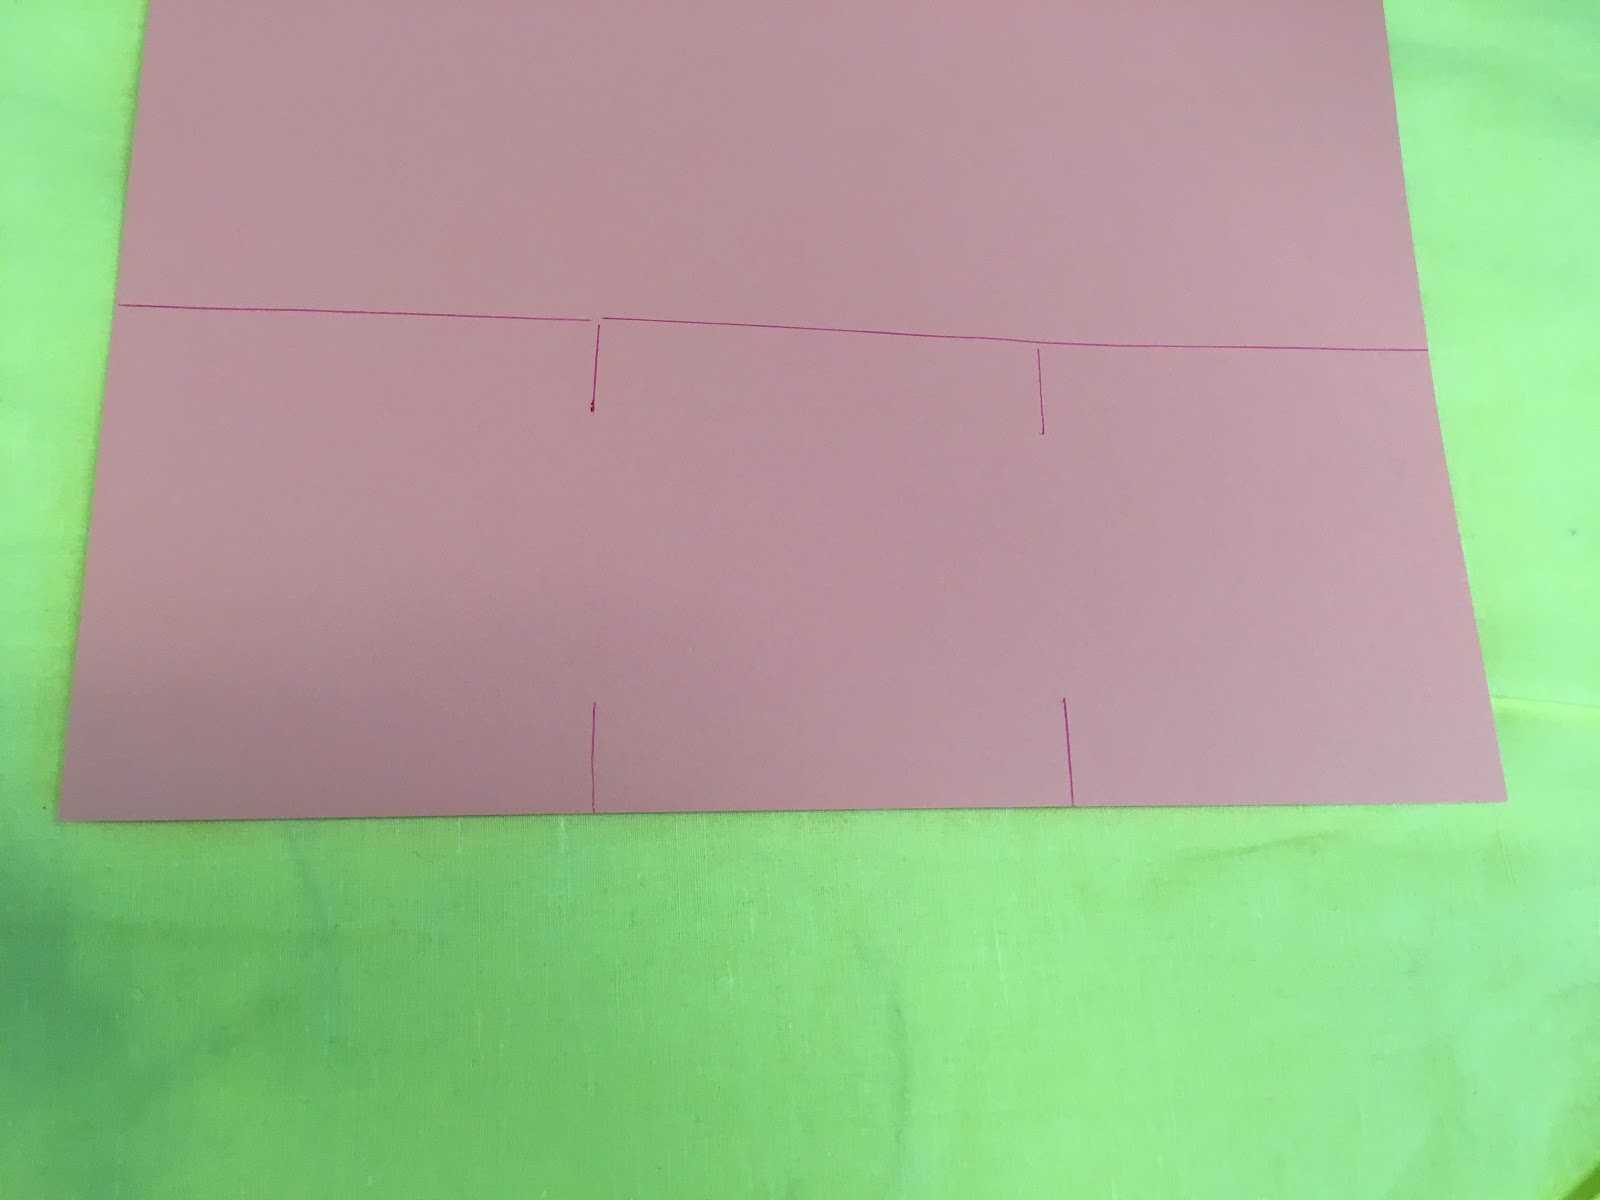
Cut out your traced pieces so that you have three total forms (two of the guitar shape, one of the box
shape). Cut the vertical lines in your copy of template one, but again, DO NOT cut where the
dashed lines would be.
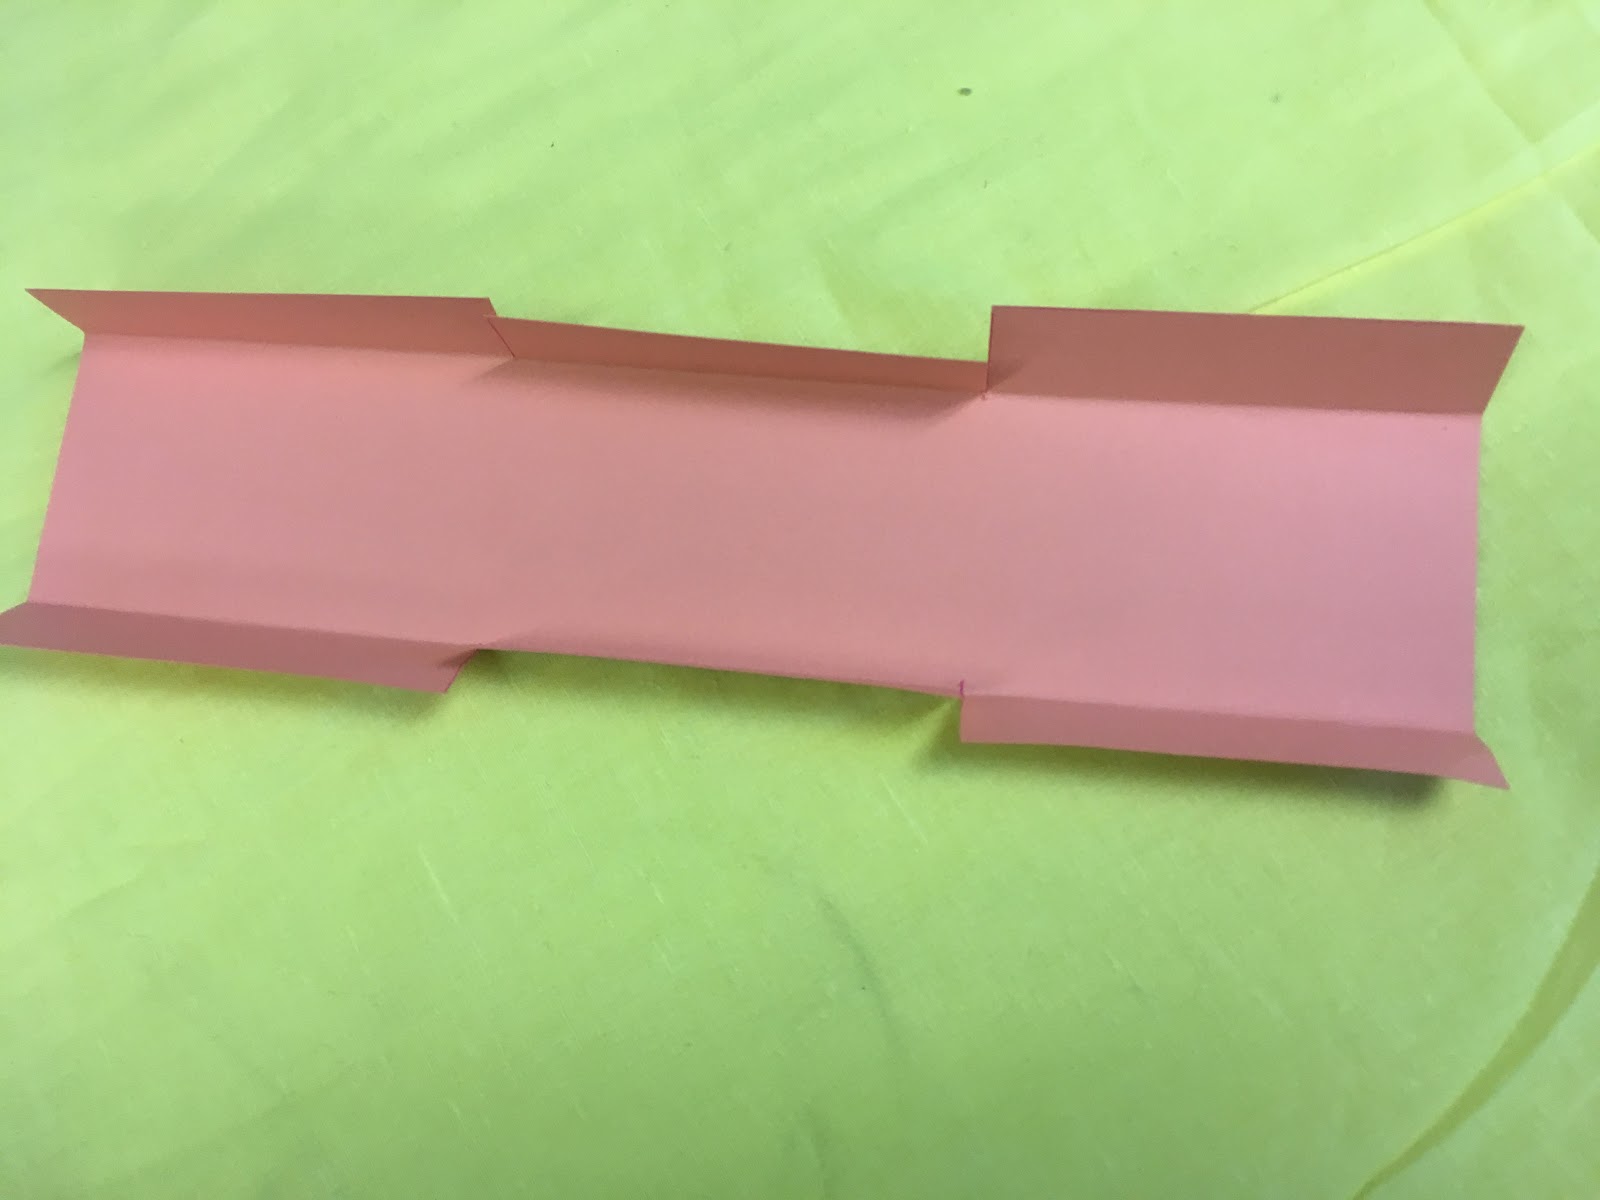
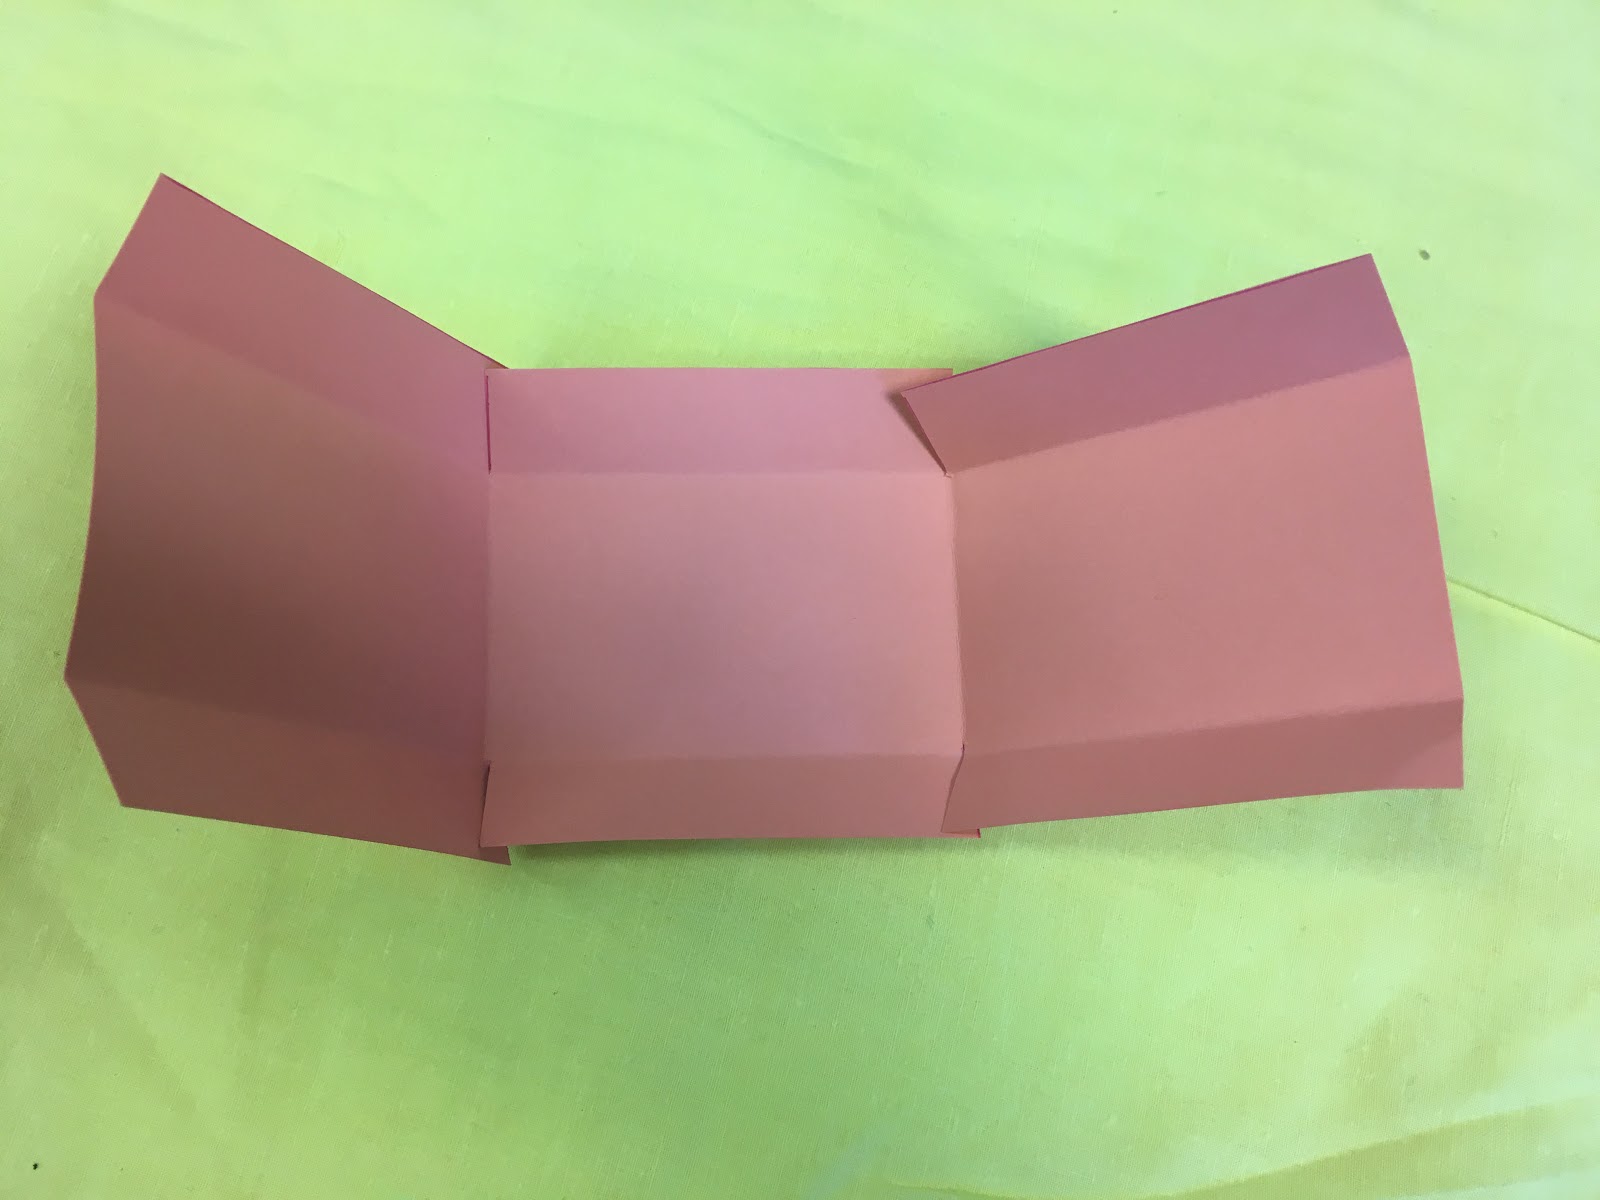

Fold the ‘dashed lines’ of your box form in toward the middle. The creases should line up with the
ends of your vertical cuts, making a straight rectangle in the middle of your shape. Once the top and
bottom are folded in, create creases from the vertical slit on one side to the one across from it. This
will let your shape fold into a box! Secure the box shape with glue or tape.
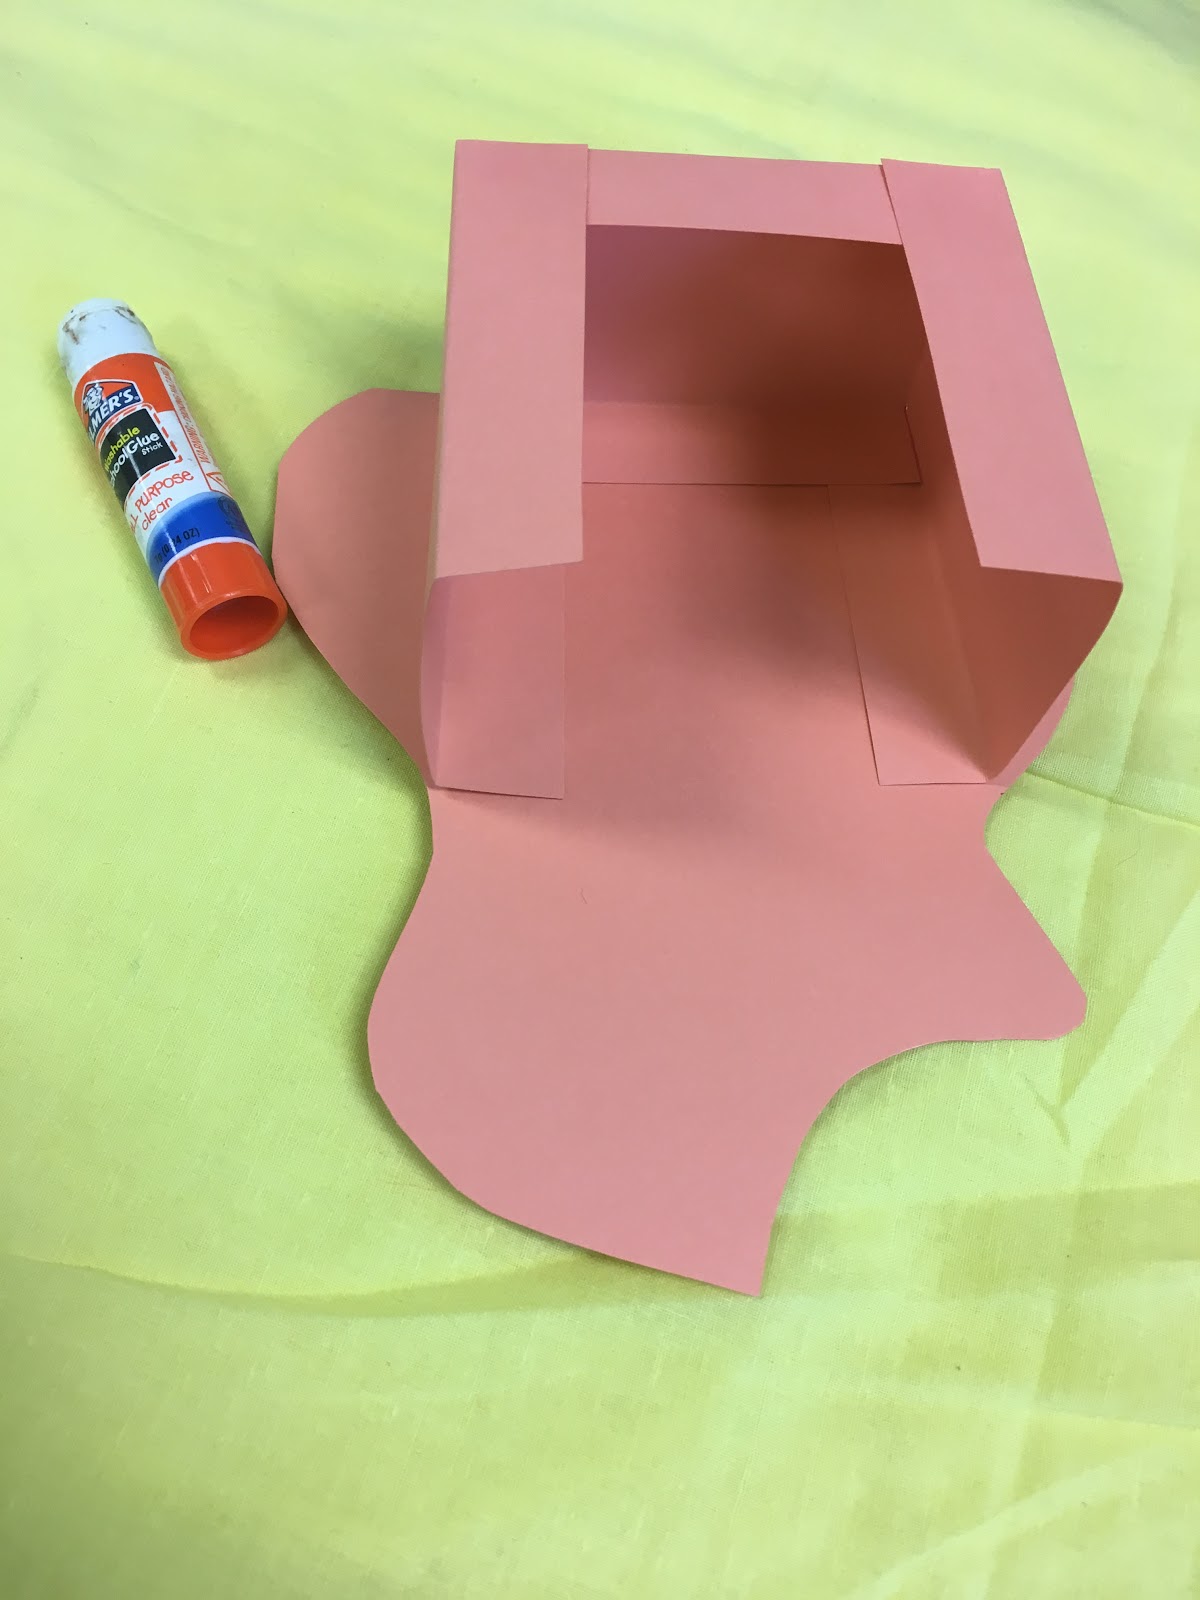
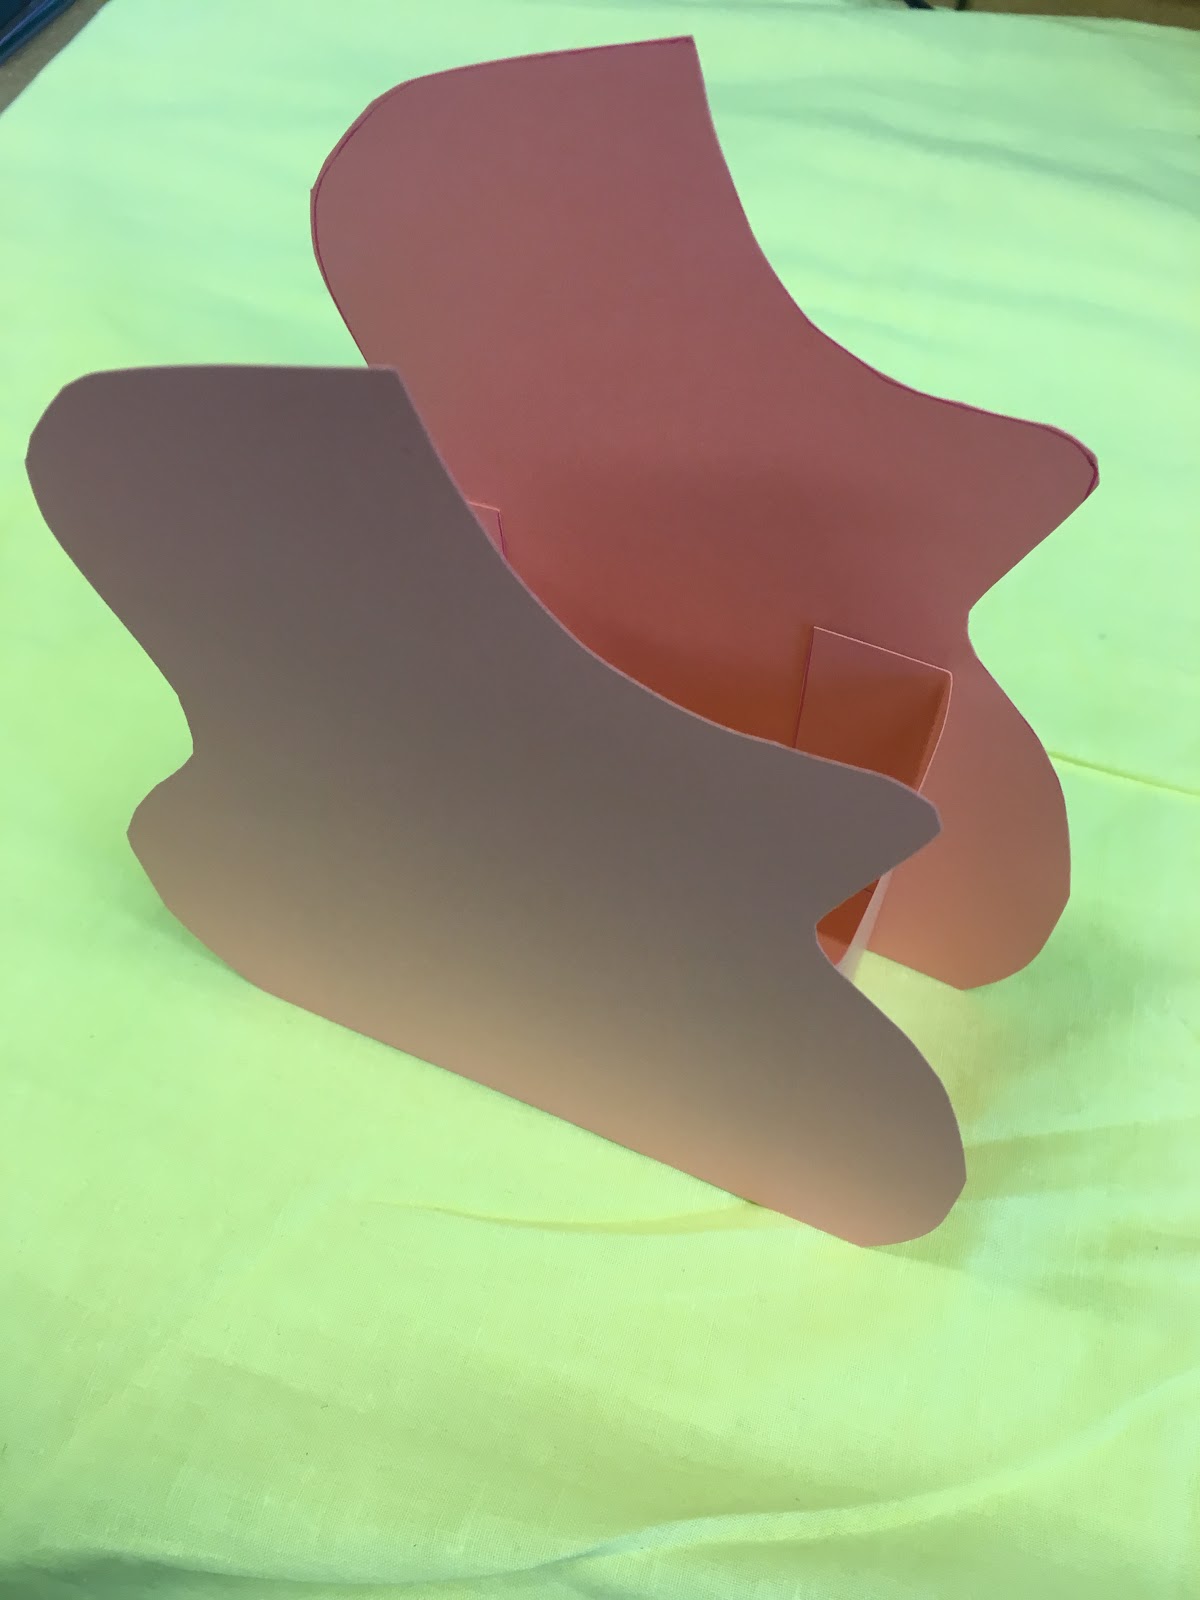
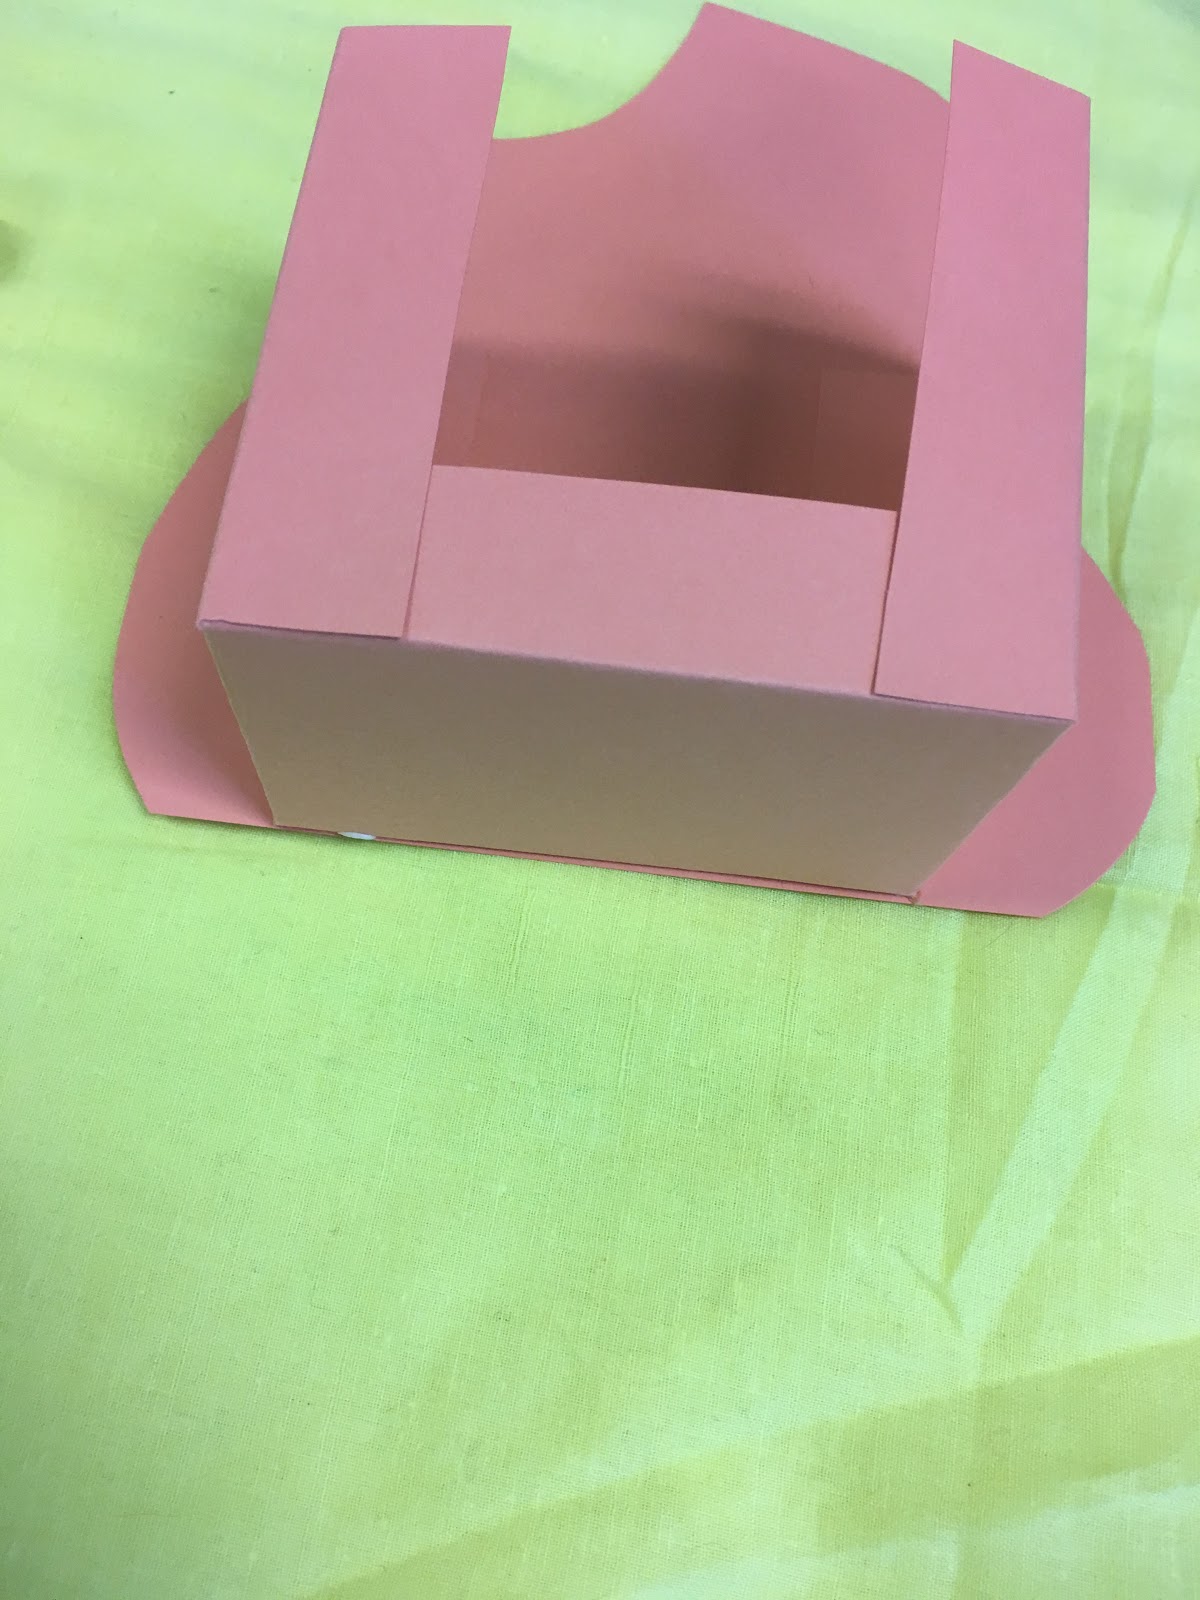
Once the box shape is created, glue the guitar forms to each of the open sides. The flat part of the
guitar will line up with the bottom of the box, and the box shape should line up with the thinnest
parts of the guitar.
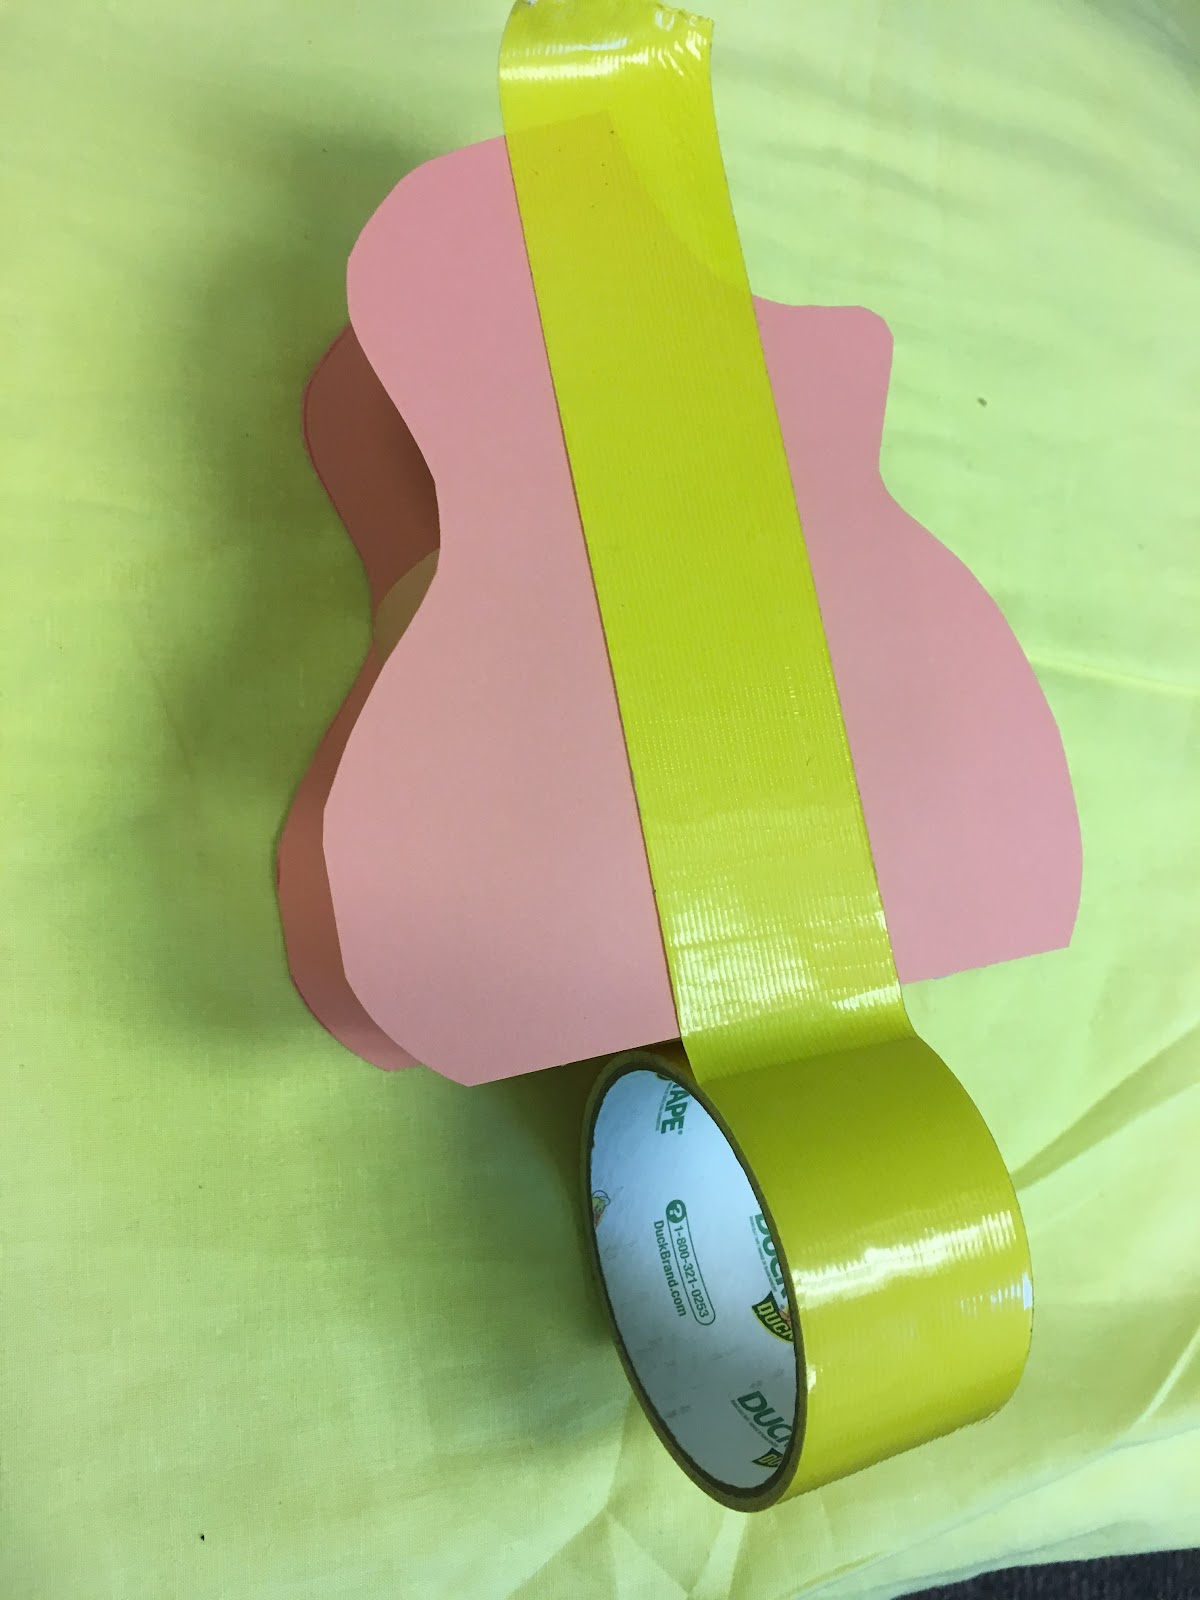

Add a stripe of duct tape through the middle of one side of your guitar box. Part of the tape will
extend past the guitar, and will hang over the edge of your cardstock. This is perfectly fine.
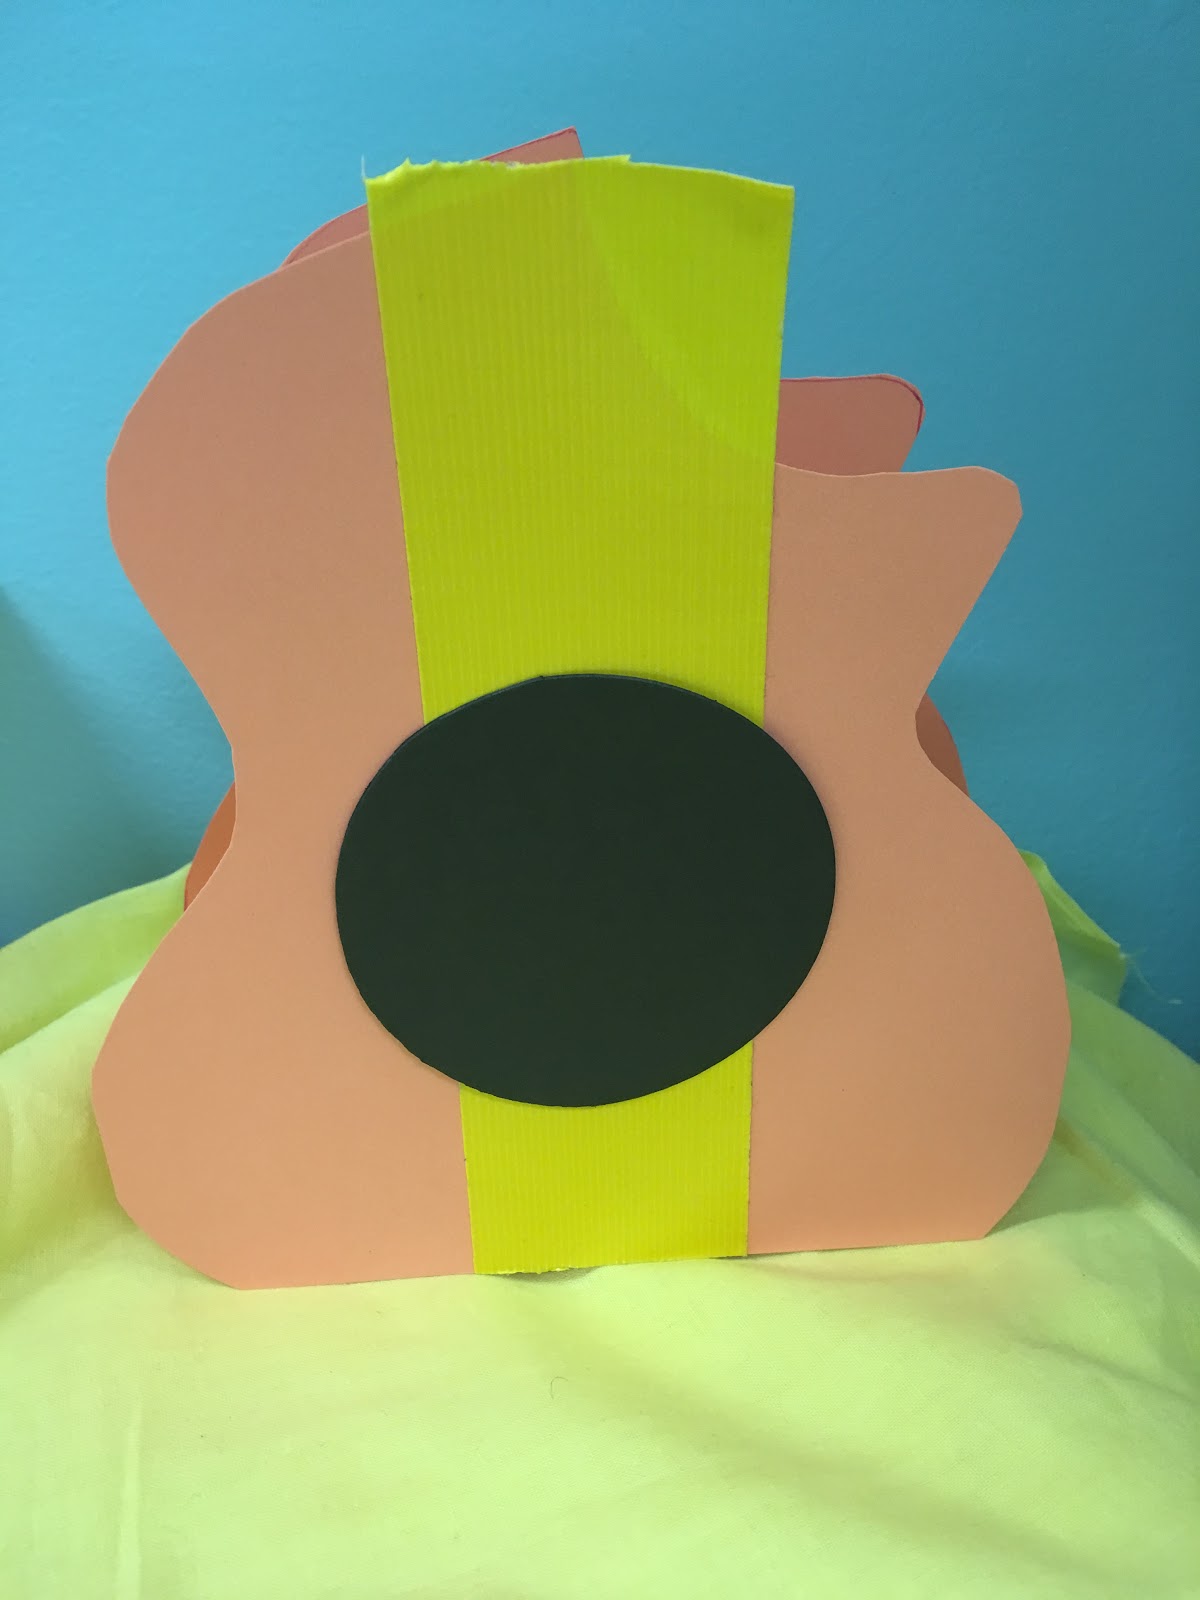
Glue a black circle of cardstock (around 3” ) onto the middle of your shape.
If you’d like, feel free to decorate your box further! I used sharpies to add strings and a few other
designs to mine, but I also think they look just fine without them. You could also add stickers,
doodles, string, or anything else you want to personalize your craft!
No comments:
Post a Comment