Our November Home School Hour covered one of my favorite subjects...
Fungus!
I took an Intro to Mycology class in college that I found surprisingly fascinating, and I've had a special interest in fungus ever since. It's pretty cool stuff!
We started out with a very basic question- What is a mushroom?
We worked our way through the first few answers (plant, vegetable, etc.) Then we learned about the separate Kingdom for Fungi, and the fact that it ISN'T a plant after all!
I gave them a trick question... Are mushrooms and toadstools the same thing? We did a class vote (raise your hand if you think they are... raise your hand if you think they aren't) and discovered that everyone was right. ¹
We talked about the purpose of fungus as an important decomposer, and about how we wouldn't like it very much if all the leaves and dead bugs continued to pile up for thousands of years until we were all buried in it. Then we talked about uses.
This is my favorite part about fungus. We talked about what people can do with fungus. We talked about eating mushrooms, making medicine, and all the many cool things we get from mycology. At Ecovative Design you can purchase samples of MycoFoam and MycoBoard. We discussed the ability to grow 'Styrofoam' in whatever shape you need for packing, and how strong plywood is when it's actually grown together instead of glued. We discussed Muskin, and Quorn, and Mycoprotein. We all decided it's pretty cool that fungus can be used for so many different things.
We learned a little bit about mushroom history, and about Fairy Rings. Waaaaay back in the old days, people suspected that mushrooms were magical because they sprouted up quickly over night, and formed in circular shapes (so logically, it had to be a result of the fairies). What the people back then didn't realize was that the mushrooms are only the fruiting body of a fungus, so a ring of mushrooms is connected. Like how an apple grows as the end of different branches on a tree, mushrooms grow at the end of different mycelial 'roots.' Plus, the mushrooms that grew so quickly were already fully formed under ground. They absorb water and spring up over night (which happens a lot faster than the growth of most plants).
We illustrated this point with grow capsules. We got magic grow capsules. It was a pretty good deal online with 72 capsules for about $9. We mixed ours together in a jar, so each kid got a mystery capsule and a bowl of warm water to watch how this works. As the outer shell dissolves, the spongy animal bursts through, fully formed, and filled with water. It's a pretty good comparison to a mushroom growing out of its cup.
(We also had a pretty good photo to show the different stages of mushroom emergence)
We went over the basic growth cycle of a mushroom to understand more about how this works (and we got to learn some cool vocab like 'mycelium' and 'germination'.
Our vocabulary lesson continued with the main parts of a mushroom. We used a few goofy hand motions to help us remember these... wiggling our fingers for the mycelium, clapping our hands together for the cup, holding up one finger for the stipe, wrapping our finger and thumb around that finger for the ring, hands on top of our head for the pileus, down our necks for the gills, and tapping the tops of our heads for the UVR. It's definitely silly (especially for the older kids), but it can really help with memorization.
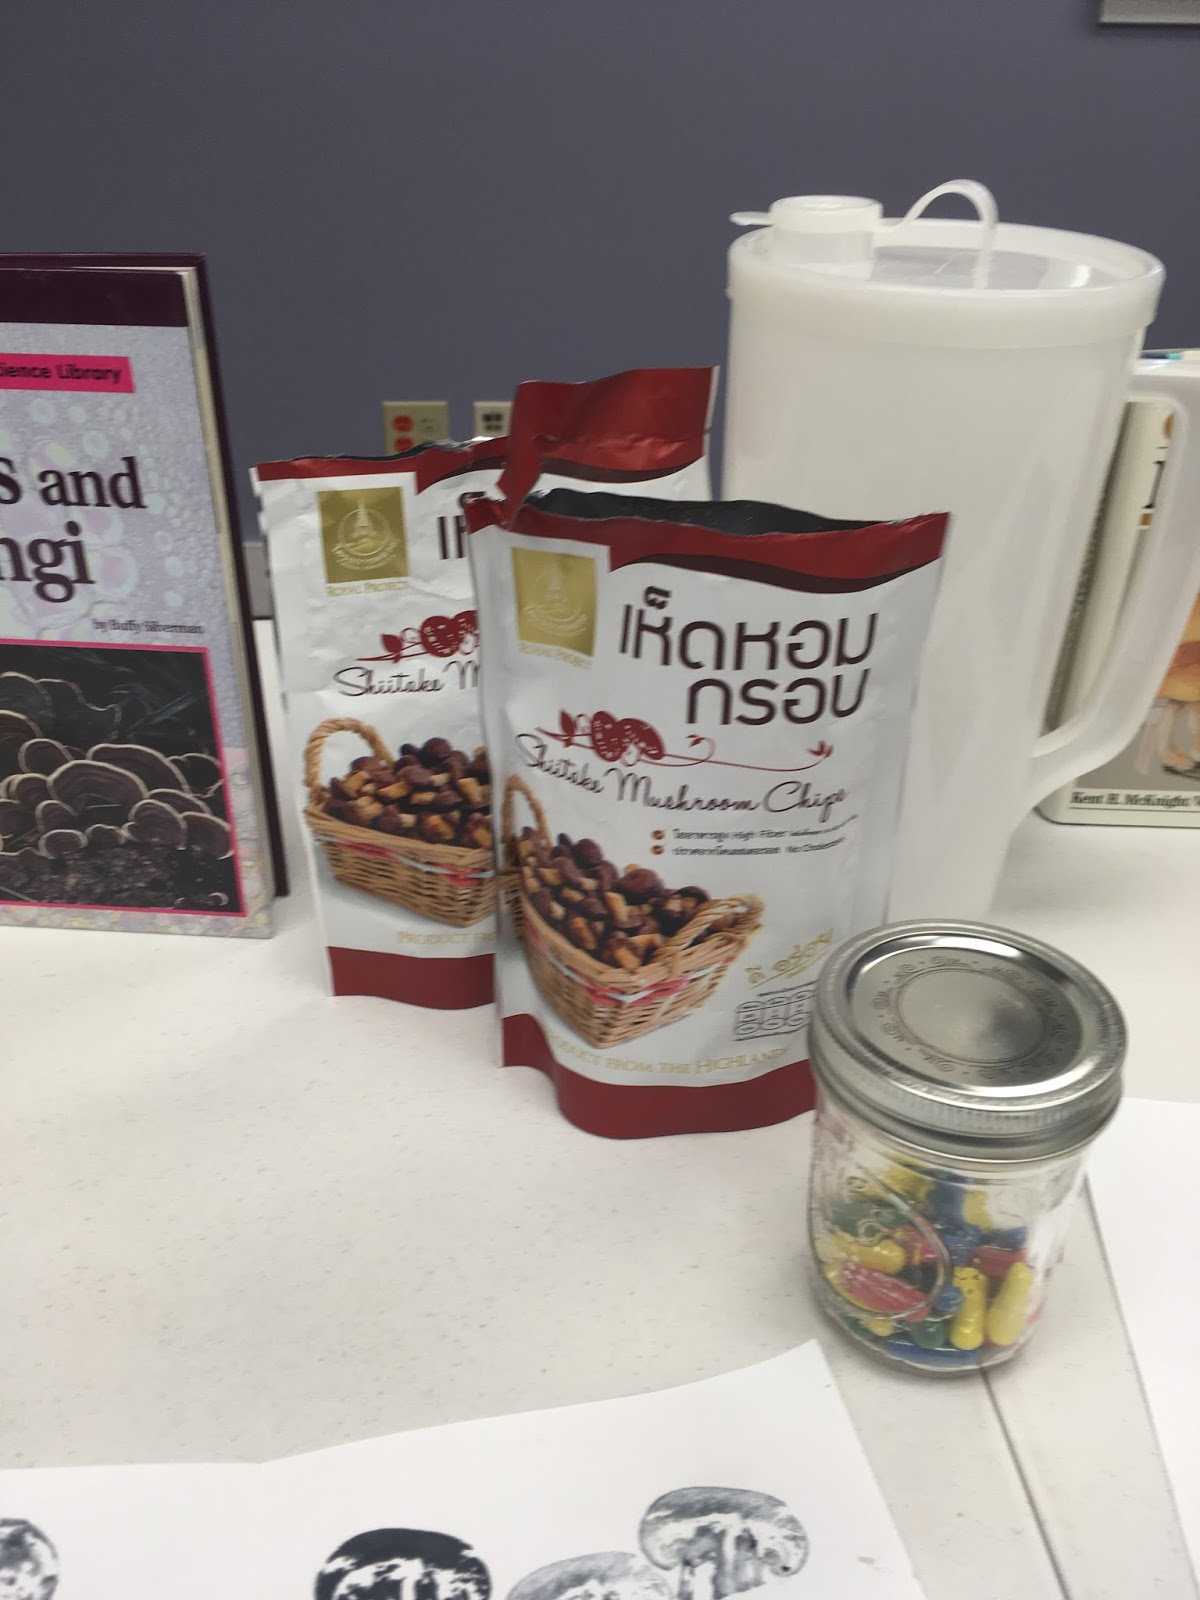
For our snack, we had these Shiitake Chips.
They tasted a little bit like Funyuns, and were adorable, tiny, crunchy little mushrooms. The kids also got to sample Mushroom Jerky. Now, I didn't care much for this one (the aftertaste stayed with me even through dinner that evening), but it was a different way to eat mushrooms, and the kids that liked it really liked it. They kept asking for second helpings of it... thirds... and if they could take some home (I eagerly obliged... I certainly wasn't going to take it home). It has roughly the same texture as beef jerky, and a very strong, woodsy flavor. We also had bananas for the less adventurous eaters, and talked about the impact of fungus on banana plants (why doesn't banana candy taste like bananas?)²
Our final activity for our fungal fun day was mushroom stamping. We didn't have enough time to make Spore Prints, so we opted for a different way to study mushrooms on paper.
Each kid got a few fresh mushrooms (just a grocery store white variety... most of our local fruits are out of season). They were instructed to cut the mushroom in half, and then stamp it into and ink pad and on a piece of paper. We were able to identify different parts of the mushroom on paper (marks of the gills and ring, the stipe, the pileus... etc.) and we were able to locate some open spaces in the mushroom where water was absorbed and held.
We cut the mushrooms at different spots for different angles (gill prints were harder to get, but they looked pretty cool).
I was pretty excited about this Home School Hour. The program ran very smoothly, and I think the kids had fun. Hopefully they learned something too!
1. They technically are the same, but most people use 'toadstool' to refer to a poisonous fruit, and 'mushroom' to refer to an edible one.
2. The Gros Michel banana used to be the major import fruit, before 1965 when the Panama Disease (a fungal disease) wiped out most of its commercial plants. We now use a different species of banana. Candy isn't necessarily based on the Gros Michel, but it does taste more similar.
For our last meeting of the Autumn session, I wanted to do something fun. So... we based our night on the 90s, and got to make some of the crafts I used to do as a kid.
Our snack was a knock off of Dunkaroos (teddy grahams with rainbow chip frosting), and Hi-C Ecto Cooler (which luckily is back for the Ghost Busters reboot).
What the pictures here can't capture is the 90s music playlist played from Spotify (complete with all the classics I made a fool of myself dancing to).
Also not captured is my denim on denim outfit, and the bobble knots I wore my hair in.
We started out with standard bead animals.
If you didn't have a neon lizard hanging off of your backpack in the 90s, you're lying.
I printed out a bunch of patterns before our meeting, from pictures I gathered online. If you do a search for 'pony bead patterns' or 'beaded keychain animals' you will find dozens. Or, you can steal the file of ones I collected here.
After I explained how the beading worked, I also gave the kids the option to create their own designs. I was pretty impressed with what they came up with. Look at how awesome this Leonardo turned out!
If you've never made a beaded animal before, I'll let you know right now that they're very easy to do, and very hard to explain. You'll start out with a long string and a keychain. fold the string in half, then thread it through the keychain, and pull both of the loose ends through the loop of the string. Pull this tight, and it will be attached to the keychain
Following whatever pattern you choose, string the correct number/color of beads onto one side of the string (string A). Thread the other side of the string (string B) up through the beads in the other direction. Pull both strings tight until the beads run horizontally under the keychain. Continue working down the pattern, adding beads as indicated.
Occasionally there will be a break in the pattern for non-vertical pieces (such as legs or beaks that stick out from the sides). These will use only one side of the string (string A OR string B... not both). In this case, you will thread the beads onto one string, then reverse that same string through the beads in the other direction. Typically, you will thread four, then skip three and revers through only the top bead.
The patterns are usually fairly easy to follow, and there are dozens of tutorials online if something doesn't make sense.
Our other craft was the stretch choker (except, we made them into bracelets, due to our short period of time for two crafts).
Almost everyone I knew wore one of these things on a daily basis. Mine was black with blue beaded stars on it. They're pretty easy to make once you get the hang of them, but the first couple usually turn out pretty rough. My current system isn't foolproof by any means, but it has certainly improved since 1998.
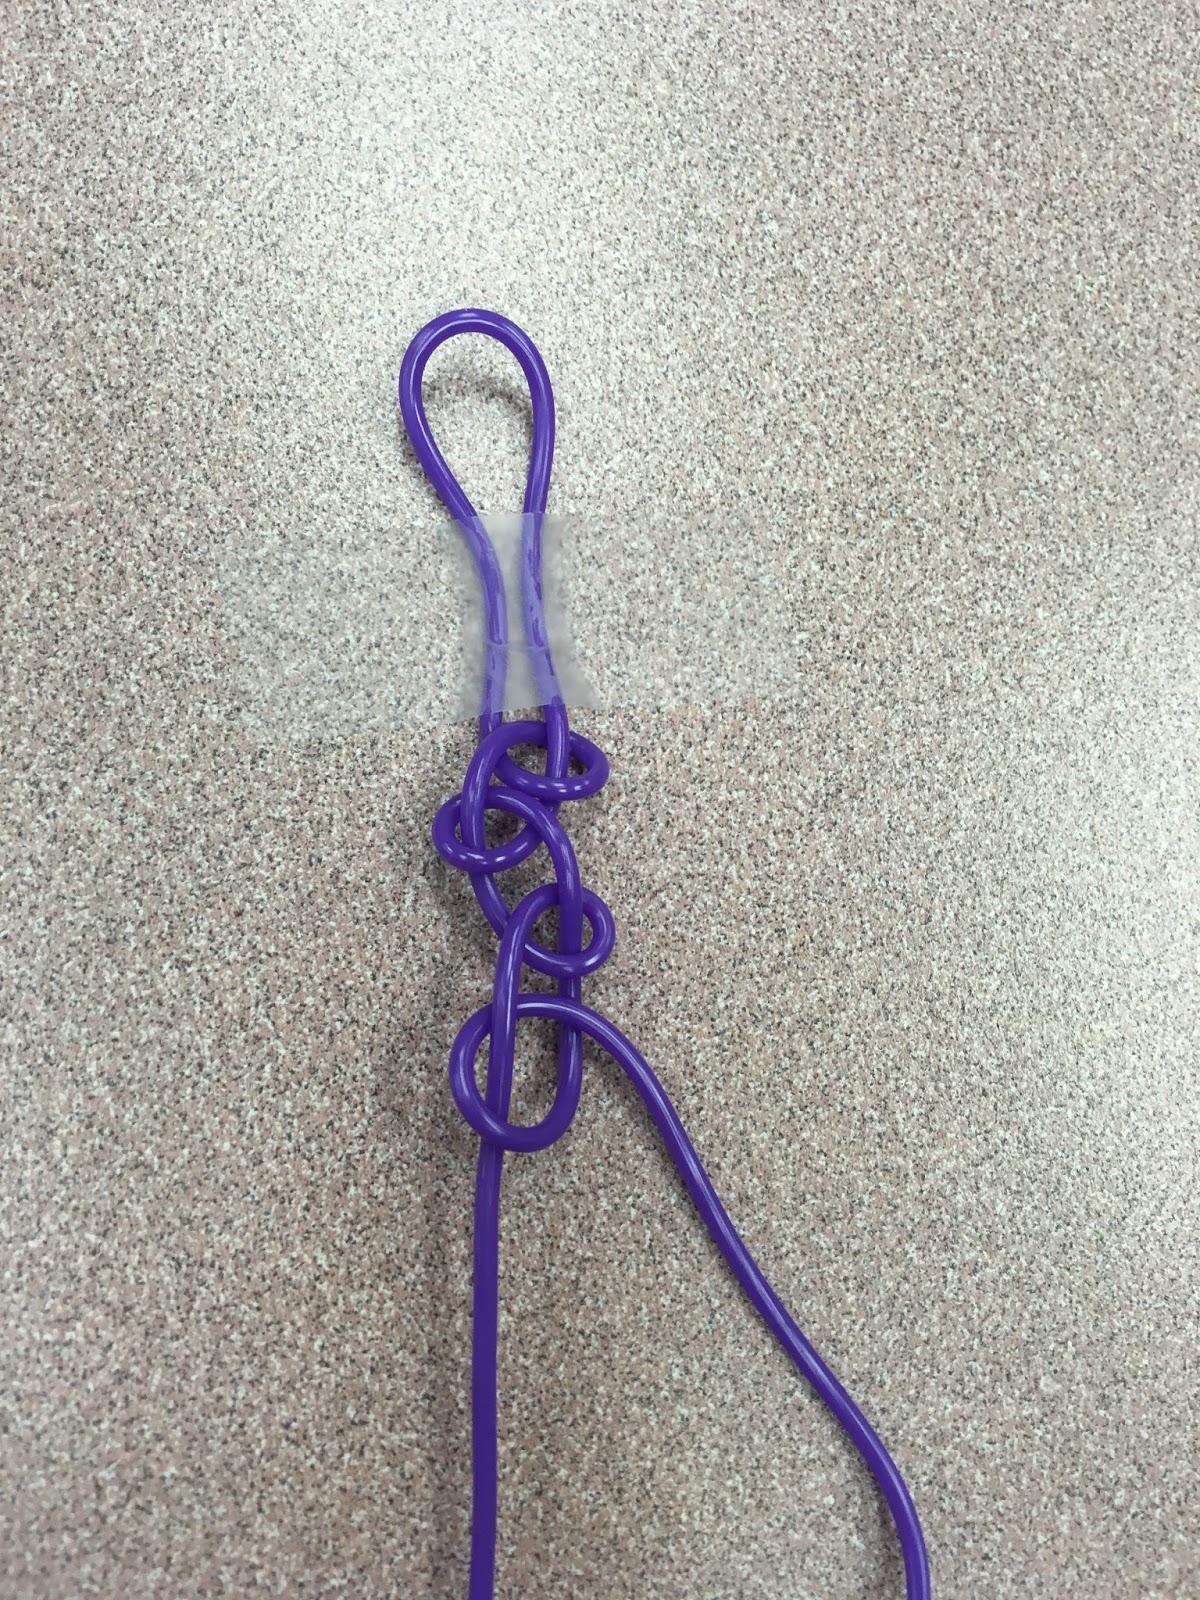
All you need for this one is stretch cord. These are usually done with a thin cord (either stretch or a solid plastic), but we used a bulkier cord to speed things up. Fold the cord in half, and tape it flat to your table, or other flat surface. You will have two strings, A, and B. In these examples, A is on the left side, and B is on the right.
The steps for this pattern are pretty simple if you don't overthink them. Cross, Through, Up, Down, Switch. You will only be moving one side of the string at a time. This will be the 'active' string. Begin by crossing one side (A) over the other (B) to make a '4' shape. Loop the horizontal (A) part of the 4 through the loop you have created by going around the stationary vertical part (B) like the first step in tying your shoes. Pull the active string (A) up (away from you, toward the tape), then down (toward you, away from the tape). After you have a loop, switch your attention to the other string, repeating in the opposite direction.
It sounds complicated, but if you focus on just a few things, it should run smoothly.
Pay attention to which string is 'active.' It can be easy to accidentally use the wrong string. With the younger kids, I have found it useful to tape down whichever string is stationary. If you do this, the 'switch' step refers to switching your tape to the other string.
Focus on keeping the cord flat. If the cord rotates, the directions get off very quickly, and the whole craft may have to be undone to fix it.
Don't skip the 'up' step. It seems unnecessary, but it really helps to even out each loop on the cord. Without this step, the loops come out lopsided, and sometimes twisted.
Recite the steps. I find it a lot easier to keep track of what I'm doing by simply repeating what needs to be done with the strings. Cross, Through, Up, Down, Switch.'
In this image, you can see the tape keeping the stationary string in place. The tape holds the left string down in the first four images, and then is switched to the right string as it becomes stationary for the next loop.
I know these directions don't make a ton of sense, but hopefully the pictures help. I also made this quick video to show the basic steps that are repeated in the pattern. At the end of the cord, simply tie a knot through the top (taped) loop. Voilà! You have an authentic 90s style choker!
For our fifth week of After School Crew, we made magnet boards. This is one of my absolute favorite projects. The kids get to be super creative with what they make, and it's a craft that can be used (rather than a picture that hangs on the fridge for few weeks before getting tossed). The magnets can be moved around on the board, or can be used to display pictures, notes, and papers.
Something else I love is that Magnet Boards are crazy simple.You just need a pizza pan (we got ours at walmart for 88 cents a piece), tissue paper, paint, craft foam, glue, and magnets.
Draw a circle on the tissue paper (it's easiest to just lay the paper on top of the pan, and trace around the bottom portion). I usually use two sheets of tissue paper for a little added thickness. Use tacky glue to attach the tissue paper to the pizza pan. I typically create a spiral pattern from the center of the pan to the edge so it's attached securely.
Give the tissue paper time to dry. I usually do this the day before... or at least a few hours in advance.
The tissue paper is just there to give you a paintable surface (acrylic paint peels off of the pan pretty easily). Once the paper is dry, it can be painted in any fashion you would like. Make sure to instruct children to paint gently, as it is possible for the paper to tear (which can be easily repaired with a little more glue, should it happen).
My space board has splotches of black, blue, and purple, with gold and white speckles for stars. The fun of this project is that kids can create whatever they want. We ended up with a Minecraft board, an underwater scene, a rainbow, a forest, a face, a pizza... basically anything you could think of.
The magnets are just made by cutting craft foam and attaching it to button magnets or magnetic tape. Allow the glue on the magnets and the paint on the board to dry... and you're done!
The magnet boards can be used to play (moving cars or people of other figures across them), to tell stories (you can easily throw some together with characters from picture books), or to decorate (we have one holding up notes about After School Crew right now).