
Let's make this UFO Flyer!

All you need for this project is a clear plastic plate, a sheet of cardstock, some paint (plus a paintbrush), the dome of an acorn capsule, a mini plastic alien, and a hot glue gun!

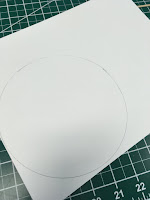
Use your Plastic Plate to trace a circle onto a piece of cardstock.
Set this aside for right now.

Start your Flyer art by adding buttons, levers, lights, and switches with paint. You should be painting on the inside (top side, if you were actually using it as a plate). These details can be as simple or complex as you want. I just made random dots and lines on mine.

Give the paint a few minutes to dry. Once it is ready (hardened enough to not smear), paint over everything with a layer of silver or gray. Let this dry as well.
While you are waiting for the paint to dry, cut out the circle of cardstock you traced earlier. (Tip: You may want to cut along the outside of your traced lines to give it a little extra space!)
You can also decorate one side of the cardstock with coloring materials during this time. This will be the bottom of your UFO.


Once your paint has dried and your decorating is complete, use the hot glue gun to attach the cardstock to the edge of your plate, sealing it up.


To finish up the flyer, use the hot glue gun to attach the plastic alien. Cover your alien pilot with the clear dome of an acorn capsule, and glue it down as well.
Hold things in place for a moment to make sure the glue hardens completely. Once everything is assembled, your UFO flyer is ready to go. Give it a toss like a frisbee, and watch the spaceship fly!